This report provides the ability to create a unique template to be used for exporting benefit enrollment information administered through the ExponentHR website.
Note: Users must have access rights to all employees within the ExponentHR system in order to have the ability to generate Benefits Export files.
Your
organization has completed Open Enrollment, which allowed eligible
employees to update enrollment elections through the ExponentHR
website. A benefit carrier is now requesting a one-time
file that captures these Open Enrollment elections so that they
may update their own internal system. Once a template is built, the unique template will then be saved and made available for future Open Enrollments or file requests that the benefit carrier may have. |
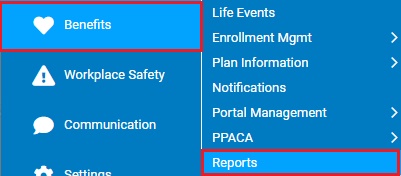
Generating a Benefits Exports File:
1. On the Menu, click Benefits > ReportsBenefits > Reports.
The ReportsReports menu will display.
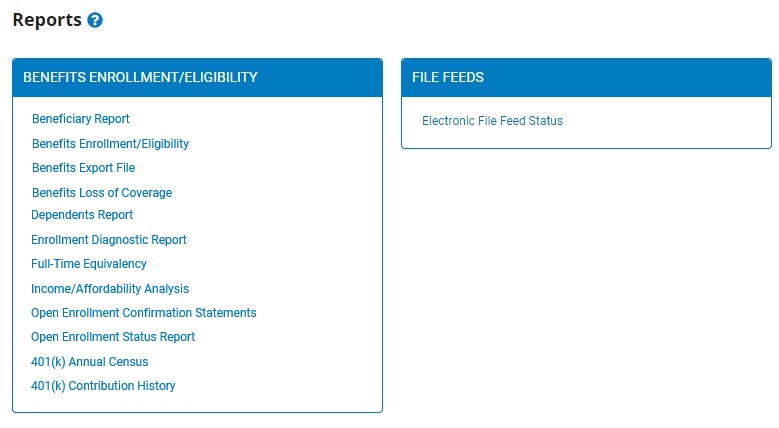
2. Click the Benefits Export File link.
The Benefits Custom Format Template SetupBenefits Custom Format Template Setup page displays.
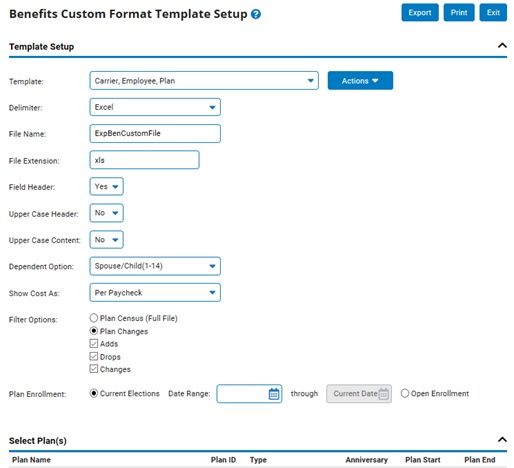
3. Select an existing template to generate in the TemplateTemplate drop-down box.

4. Click the ExportExport button.

Note: If there is not an existing template to use, select the Add option from the Actions drop-down button to create a new custom template.
Creating or Modifying the Basic Setup of the Report:
1. Select an existing template to modify in the TemplateTemplate drop-down box or choose to create a new template.
Creating a New TemplateCreating a New Template
1. Select the Add option from the Actions drop-down button.
2. Enter in the name to identify the new template in the Template Name (Add)Template Name (Add) text box.
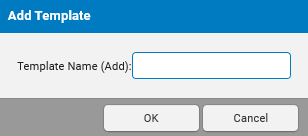
3. Click the OK button.
The Benefits Custom Format Template SetupBenefits Custom Format Template Setup page displays.
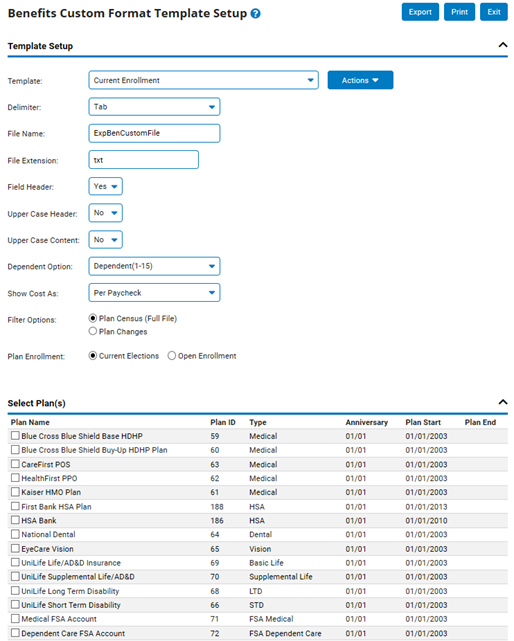
2. In the DelimiterDelimiter drop-down box select how columns on the report results should be separated.

Selecting Tab separates each column with a tab spacing.
Selecting Excel separates each column by cells within Microsoft Excel.
Selecting CSV (Comma w/quotation marks) separates each column by putting quotation marks around the values within each column.
Selecting Fixed Width separates each column with an equal amount of space.
Selecting Other Character separates each column using a single character that you define.
3. Enter the name of the file in the File NameFile Name text box.

4. In the File Extension text box enter in the extension you would like to have the file opened with (ex. csv, xls, txt, etc.).
5. In the Field Header drop-down box indicate if you would like the generated report results to have a header listed for each column.
6. If a header is being included on your report, indicate in the Upper Case Header drop-down box if the header should be displayed in all capital letters.
7. The Upper Case Content drop-down box is used to determine if all the text within the report results should be displayed in all capital letters.
8. Indicate in the Dependent Option drop-down box how a spouse should be displayed on the report results.
Selecting Dependent (1-15) indicates that the spouse is treated as one of the 15 available dependents.
Selecting Spouse/Child(1-14) indicates the spouse displays first followed by and any remaining dependents.
9. If contributions are selected to appear on the file, the Show Cost As drop-down box is used to indicate how the contribution amount should be displayed (per paycheck, per month, or per year scheduled contribution amount).
10. Select how the file should be populated with the Filter OptionsFilter Options choices.

Plan Census (Full File) - The generated report results reflects all employee elections, whether there was any type of election change or not.
Plan Changes - The generated report results only reflect employees that have made an election change. If selecting to view Current Election changes in a date range, you are able to select the Change Types to view those adding coverage, ending coverage, or changing coverage type. If selecting to view Open Enrollment changes, you are able to view those adding or dropping coverage.
11. Select the Plan EnrollmentPlan Enrollment type to be reflected in the generated results.

Current Elections - The generated report results reflects benefit elections as of time report is generated. If selecting to view Plan Changes, then you will be able to enter a Date Range to view all changes that occurred during that time.
Open Enrollment - The generated report results reflect changes made during the Open Enrollment period.
12. Select in the Select Plan(s)Select Plan(s) section all the benefit plans that should be reflected on the generated report results.
_cb.jpg)
13. Once, the basic setup of the report is complete, you can click the expand/collapse carrot button (^) to hide the basic setup making the page simpler to work with when selecting which fields to add to the report results.
Creating or Modifying Columns Included on a Report:
Note: You can click the expand/collapse carrot button (^) to hide the basic setup making the page simpler to work with when selecting which fields to add to the report results.
1. Click the AddAdd button in the bottom section to add an additional column to be reflected in the report results.

A new columnnew column is added to the bottom of the report to be defined.

2. Select the ExponentHR field in the Contains drop-down box to appear in the newly added column.
The list of available ExponentHR fields is broken down into the following sections within the drop-down box:
Demographic Information - Displays employee and dependent demographic information such as Address, Name, and SSN.
Employment Information - Displays employee related work demographic information such as Hire Date, Job Title, and Salary.
Benefit Information - Displays benefit related fields such as Coverage Type, Effective Date, and Plan Name.
Export Information - Provides the following additional Non-ExponentHR related fields that may be used in formatting the file:
Action Type - If choosing to run a Plan Changes file, this will display if the change is an add, drop, or change in benefit coverage.
Leave Blank - This will provide a blank column in your generated report results.
Custom Text - This will allow you to have a hard-coded text to appear in the generated report results.
Record Number - If selected, each row in the generated report results will reflect a counting row number.
Space - This will provide a column with a single space.
3. In the Header text box enter in the text you would like to appear as the header for the respective column.
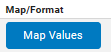
4. In the Map/FormatMap/Format section you are able to convert ExponentHR field values into the equivalent value with the carrier.
Mapping ExponentHR ValuesMapping ExponentHR Values
1. Select the ExponentHR field in the Contains drop-down box.
2. Click the Map ValuesMap Values button.

The Map Column ValuesMap Column Values page displays.
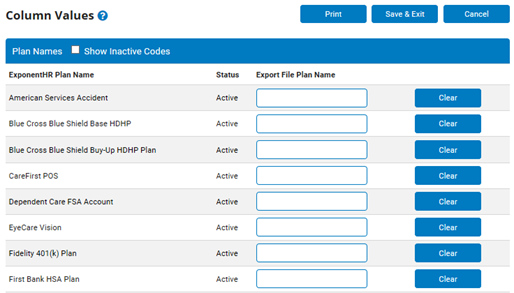
3. In the left column is the current ExponentHR field value. In the right column you are able to enter in the equivalent value that is desired to appear instead on the generated report results.
4. Click the Save & ExitSave & Exit button when finished mapping the values.

5. If the order of columns needs to be rearranged,
use the  and
and  buttons to move a respective column up or down in the priority of appearance.
6. The Plus (+)Plus (+) button allows you to be able to combine multiple ExponentHR fields into one column.
Combing Multiple ExponentHR Fields into One ColumnCombing Multiple ExponentHR Fields into One Column
1. Select the ExponentHR field in the Contains drop-down box that should appear first in the final column's results.
2. Click the Plus (+)Plus (+) button.
An additional row is added that is now associated with the initial field chosen.
3. Select the second ExponentHR field or special character (ex. a single space or dash) in the Contains drop-down box.
4. Repeat the steps again for each additional field or character you would like to add to this single column's value.
5. Enter in the name of the column in the first Header text box. The remainder Header text boxes can be left blank.
Note: An exampleexample of when this might be beneficial is when needing to combine an employee's first and last name into a single column.

7. Click the ExitExit button when finished modifying a report.
